Everything about polymer inject molding is awesome! 3D printing can create all different kinds of things that we use every day, from toys to cups to vital components for cars and airplanes. This is how many plastic products we see around us manufactured. Now, let’s understand how this works and why it is so cool!
It is a special process for plastic forming with plastic molding. It begins with tiny pieces of plastic known as pellets. Pellets are tiny pieces that are in the shape of small balls. To begin with the pellets are heated to the point they liquefy into a thick viscous liquid. Then, the melted plastic is forced into a mold. The mold is like a big cookie cutter, shaping the plastic into whatever we want. After cooling down, the mold opens up and the plastic object is ready to be used!
Particular Advantages of Polymer Injection Molding Polymer injection molding, b devoted to that, has many advantages which led people to use them heavily. First, it is very fast. These machines can quickly create several products, allowing the process to take less time. Second, it is very precise. The products are perfectly designed with thorough detail in the molds. It is essential to ensure that each step flows perfectly into the next. Finally, injection molding of polymers is a very versatile process. It can be set up to create many shapes and sizes of products which means this can be used for a variety of items!
Step 1: Design the Product — The initial step is to figure out what you want to make. This is done on a computer program that assists in the design process. This has aspect such as the details, including the specific size, shape, and any unique characteristics that the product will feature. It is a very important step because, everything starts with a good design.
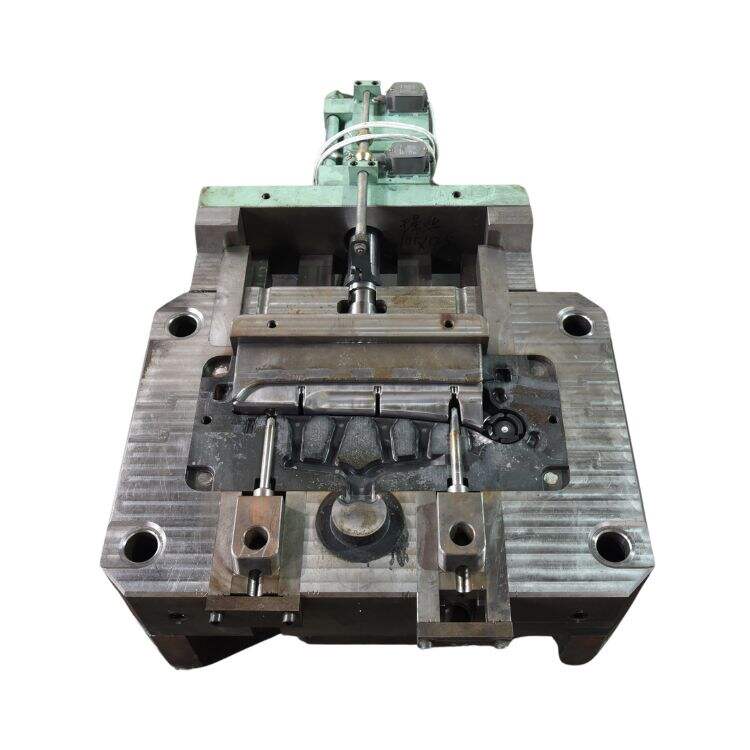
Step 2: Create the mold – After your design is laser-cut, the next step is to create the mold. The mold is often constructed from a durable metal that can be reused multiple times. It is very much precisely crafted to match the design. The mold consists of two parts, top and bottom, that fit exactly together.
Step 4: Cool the Plastic — Once the plastic has been pushed into the mold, it will then move on to a cooling area in order to harden. Cooling usually involves pumping water over the reactors. They cover the mold with cool water, which gives the plastic a quick cooling and makes it solid.
Step 5: Eject Product — When the plastic is cooled and solid, the mold opens, and the product pops out. A special set of tools known as an ejector pin accomplishes this task that helps push the product from inside the mold. Exciting to finally see the new product out in the world!
Our comprehensive logistics solutions provide end-to-end services, from order processing to final delivery. We leverage advanced tracking systems and a global network of carriers to ensure timely and secure delivery. Since its establishment, Moldie. has provided professional solutions for more than 50 clients and 20 countries around the world. Moldie has cooperated with DHL, Fedex and UPS for fast sample delivery. Moldie can ship goods by sea, air and train in good packing way suits for global transportation.
Moldie has provided injection & plastic parts solutions since 2008. 3000+ square meter facility enhances us to serve clients worldwide. From the automotive sector, where we serve prestigious brands like Mercedes-Benz, Volkswagen, Audi, Maserati, Chrysler, and GM, to leaders in other fields such as Schneider, Phillip, and IEK. With a reputation for excellence in OEM/ODM services, Moldie is not just a manufacturer; we are innovation partners, providing comprehensive services including part design, prototype creation, mold design, and large-scale mold production.
Our molds are known for their exceptional quality and precision. Testing equipment is an indispensable means of guaranteeing the mold manufacturing process. A high-quality quality management team with precise testing equipment is the guarantee for creating high-quality molds. The quality inspection department is equipped with two high-precision three-coordinate and 3D scanners. Moldie promises to issue a full-size report within three days after the product trial, and a 3D scan report within two days. Moldie has been a supplier with ISO certificate.
The engineers at Moldie have extensive design experience and comprehensive development knowledge. Moldie will scan any provided samples and generate a product blueprint. Once the customer reviews and approves the blueprint, we can begin mold assembly and drawing design based on the customer’s existing project.Moldie Engineering Center consists of more than 30 engineering and technical personnel. They can deal with engineering, design simulation, machining, inspection to support and guarantee the quality and function the tooling we constructed.


 EN
EN
 AR
AR
 BG
BG
 HR
HR
 CS
CS
 DA
DA
 NL
NL
 FI
FI
 FR
FR
 DE
DE
 EL
EL
 HI
HI
 IT
IT
 JA
JA
 KO
KO
 NO
NO
 PL
PL
 PT
PT
 RO
RO
 RU
RU
 ES
ES
 SV
SV
 LV
LV
 SR
SR
 SK
SK
 SL
SL
 UK
UK
 HU
HU
 TR
TR
 FA
FA
 MS
MS
 GA
GA
 CY
CY
 IS
IS
 HY
HY
 AZ
AZ
 KA
KA
 BS
BS
 LA
LA
 KY
KY